April 2016

As you know that Blogger is the most popular website that allow all the users to create blog for free in order to do blog SEO or other factors. Moreover, Blogger can help you to earn money by adsense.


First of all, let me show you how to create blog with custom domain

- First you have to create a new Gmail account
- Go to www.blogger.com
- Sign in to blogger
- And then you have to add your blog name and blog URL adress 
 Ex: www.khmerblogseo.blogspot.com
- You will have a blog which have nothing so you need to create posts, pages or anything else in order to improve your blog especially you have to add the contents which is very important that relate to some niches such as: Technology, Health, Insurance or something else.
- Anyway, your blog still have URL like this (www.khmerblogseo.blogspot.com)

If you want to change it into custom domain like .com .net or .info
Please follow the instruction below:

- Go to www.freenom.com
- Sign in to freenom account
- Seach custom domain which suitable with your blog and purchase it 
Ex: www.khmerblogseo.com
- And then get back to your blogger and go to Setting > Basic > Blog Adress
- So now you have to click on Setup a 3rd party URL for your blog
- Next step you have to copy your custom domain name that you already purchased and paste it into the column

- And then move back to your freenom account and go to my domain > Choose one of your domain name and click on Manage domain > Manage freenom DNS
- Copy Name, Label or Host Field

- Go to client area in your freenom account and add 2 records and choose Panel as CName and paste Name, Label into the column and than click save changes.

Below is the video


Donuts are so yummy! Uh. I am teaching these teenagers about healthy eating. And you Homer, are not setting a good example. And why might that be?You're eating a donuts! Donuts are unhealthy! We need to teach these teens what kind of foods they most need! So put that donuts away and let's begin!First up, let me tell you what the key nutrients are for a teenager to eat!First of all, and most importantly, is calcium! Calcium is vital for your growing bodies!Calcium helps you reach peak bone density and helps you build strong bones for life. So where can you find calcium? Well that's the easy part. Calcium can be found in diary foods. Good question! What does happen when you don't have enough calcium?Well it will make your bones weaker.  This can lead to diseases such as osteoporosis. With osteoporosis you can get weak bones that can break easily. This can lead to fractures, most commonly hip fractures. So the question is, do you want this to happen to you?If not, then you better make sure you're having enough calcium in your diet,and just remember, diary products give you calcium!What else is important? Iron! What is iron? Iron can be found in red meat!What is red meat?  And those foods are important to you!What happens if you don't have enough iron? Well, you can get anemia. The best place to find iron is in red meats, such as those. Well those foods are the most important for a teenager like you,but there are other important foods too. These include foods that contain protein, and carbohydrates. You don't need so much of these but it's a good idea to monitor how much of those you eat too!Well now that I have taught you what foods are best for your growing bodies,I hope you will all take my advice, and make sure you are eating right!


Every year American consumers spends millions of dollars on enzymes.  Enzymes to this, enzymes for that, enzymes to digest this.  What do we have in front of us? We have one of nature’s most powerful enzymes on the planet and I’m about to show you a smoothie that’s absolutely so creamy, so delicious, so decadent, so desirable that when you drink it you are absolutely gonna be transfixed to a place in Mexico that maybe you’ve been, maybe you haven’t been there yet but I’m taking you there today with this digestion smoothie.  Absolutely amazing!So as you can guess it, the papaya you can get at your grocery store or farmers market. Papaya contains the digestive enzyme Papa in which is used like Lamebrain right? Lamebrains in pineapple.  It’s what’s used on a lot of homeopathic medicine for anti-pain,anti-inflammatory, for allergies, sinuses, stuff like that.  It promotes strong immune system, 80% of the immune system is in the gut so as you guess if it’s like an enzyme it actually helps your gut heal as well.  Great for cancer prevention so anybody that’s experiencing cancer out there, papaya’s absolutely amazing! It’s loaded with fiber and has tons of other amazing benefits, nutrients, amino, and petrochemicals, all of those things that we’d love to get down with at Fit-life TV.  I’m about to make this smoothie.  I’musing the Blend tec blender today.  I absolutely love my Blendtec and I know you will as well. Alright so let’s talk about the ingredients.  We got one papaya and a mid to small.  We have a pineapple which is loaded with vitamin C and it’s also a super human immune boosting food that’s gonna help us with that because of the lamebrain and it also helps with digestive support so that’s the name of the game.  We have about a handful of spinach depending on how big your hands are right? We have a half of a cucumber that’s gonna help give us a base.  It’s gonna make it a little bit creamier as well.  Absolutely amazing.  I have one banana.  Banana is going to sweeten it up a little bit, add a nice flavor to it. Banana’s actually have an ingredient in here, tryptophan which converts to serotonin the gut so it makes you happy.  Coconut water is also full of potassium.  Coconut water is amazing at replacing those electrolytes if you’ve been out in the sun, maybe you’ve been working doing your thing you need a little coconut water.  This is the pink, pink actually has more nutrients than regular coconut water.  Love the taste of that.  Alright here we gamy friend, wow! Creamy, delicious, delectable, divine smoothie guaranteed to make your body rock! Love this stuff.  Alright so at that time who won the juicer? Remember next week if you wanna win the juicer scroll down to the bottom of this blog post. Today’s juicer winner is Linda MacDonald! Linda use this juicer from Kuving’s to radically increase the amount of fresh veggies and fruits in your diet.  Keep us posted on how amazing you feel.  Congratulations Linda! If you’re looking for something to mix after workout there are some papaya in there get that digestion going,help assimilate those nutrients, help shuttle that protein into those muscles after workout. Now this is not a weight loss smoothie, I never said this is gonna help you lose weight. This is a smoothie that I would probably have after workout.  I may actually add a little almond butter in this too just to mix it up a little bit.  David actually came up with that idea, our video guy right? Almond butter, it’s gonna help balance out that sugar spike from the banana and everything else.  Absolutely amazing smoothie though.  Your guests when they come over, you make this smoothie for them they’re gonna be blown away with the taste.  So try it out today! As always my friend, remember we’re in this together.  Mother Nature has all the answers we’ll see you soon.  So if you’re looking for something to mix? That’s actually really good.  I had a friend who tell me he used to cut up papaya and actually put it on a New York strip steak and he left it there and as time went on it started to deteriorate, I got a little bit of speech impediment today, it started to breakdown the steak.  Now that’s amazing! So papaya, you ever seen this thing? This thing can get huge, am I right? They get massive.


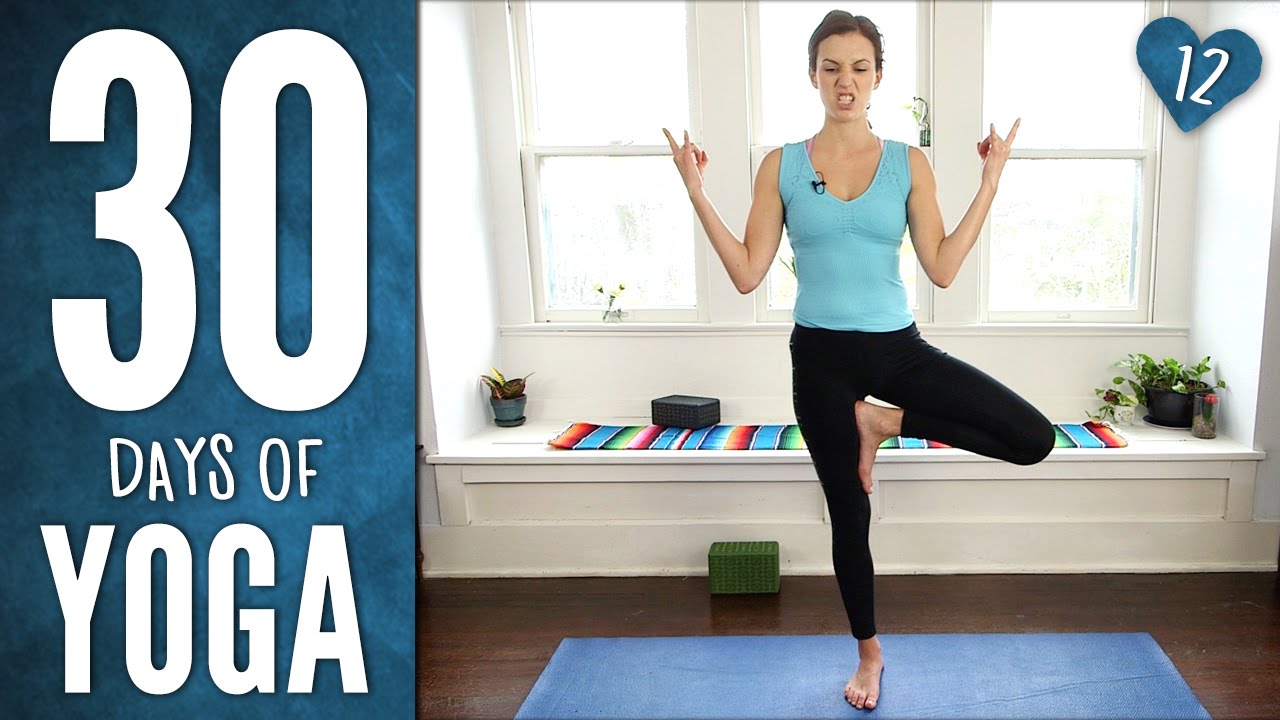
Now find something you can focus on in front or ahead.  Maybe just past the nose, as we gaze down on our drishti and collect strength.  Squeezing in, in, in.  You can imagine a block between the thighs here, sit bone to heel connection.  You might reach the fingertips up and overhead here.  You might stay palms together at the heart. Take one more breath wherever you are.  And then exhale with control, with ease.  We slowly lower back down.  Awesome.  Shake it off by inhaling, reaching fingertips up and overhead,and exhale diving forward.  Inhale, halfway lift.  And exhale down.  Like a little animal,like a puppy dog, we walk the palms forward.  Keep the knees bent.  Enjoy this being alive in your body today, and then find your downward facing dog. Now we're going to drop the left heel.  Inhale, lift the right leg high.  Bend your right knee. Instead of keeping the hips square today, we're going to open up by stacking the hips one on top of the other.  So careful not to crash in your left shoulder here.  But keep a little integrity in that right palm by dropping your right shoulder down.  You can rotate that foot.  You can kick out.  Breathe one more breath here.  And then we step that right foot all the way up and into our lunge.  Find your Warrior I.  Nice and strong.  Inhale, rising up.  Sink into that front knee.  Deep breath in.  And exhale.  Open out, Warrior II.  Inhale, reach forward, up and back, Reverse Warrior, Peaceful Warrior.  And exhale, spiraling all the way back down to your lunge.  Great. Slide the right toes back and take a vinyasa.  Again, we can lower the knees, keep it real chill here, or we can add a little fire, Chaturanga to Up Dog.  Follow your heart.  Together we'll meet.  Downward facing dog.  Deep breath in.  Long breath out.  Drop the right heel, lift the left leg high.  Then bend that left knee and stack that left hip over your right.  Square through the shoulders.  Breathe here.  Then squeeze that left knee all the way up and through, step it into your lunge.  Pivot on the back foot.  And when you're ready, find a nice, strong Warrior I.  Arms reached up high.  Reach, reach, reach.  Inhale and exhale. Send them out, Warrior II.  Lean back, tuck your pelvis.  Sink deep and reaching forward up and back.  Keep it soft and easy, peaceful warrior.  Stretch it out.  Deep breath in.  On and exhale, We cartwheel all the way back.  Great.  Step the back foot up to meet the front,when you come back to your lunge, and we find that forward fold.  Inhale.  Halfway lift, keep a soft bend in the knees.  Then exhale out.  Inhale, reach it all the way up.  Full body stretch.  And exhale back down to your heart.  Awesome. Take a second to observe your breath.  Just notice how you feel.  And then we're going to bring the soles of the feet together, the arches of the feet together for a little tree practice.  So I'll actually come to face the front here, and we'll draw energy up through the arches of the feet, and really find this upward current of energy as we shift the weight onto the left leg.  Peel up off onto your right toes, and take it nice and slow here.  As you interlace the fingertips, catch the right knee or the right shin in your palms.  Inhale. Press away from your standing leg.  Lift up, squeeze your right knee in, and plug your heart, and lift up.  Elbows down. So if you're new to balancing practice, this might be a challenge for you.  You can bring your left fingertips to the wall here.  Again, remember when we were pressing the pelvis into the earth, we're remembering that integrity as we press into the standing leg, tuck the pelvis, and lift the heart.  Great.  Now, slide your right fingertips to your right ankle,and see if you can draw your right heel up towards the center line.  Another option would be to bring it just below the knee.  And then a final option is just to keep those toe son the ground, no biggie.  Working on drawing the hips forward and lifting up through the heart. So we're all at different levels here.  We have a little tree practice.  On the day of Christmas here in the United States, you will get a partridge in a pear tree, is it right? Here we get silly Adriene in a tree.  Shut up, Adriene.  Okay. Find your tree pose, find your breath. Hold onto that drishti.  If your right foot is pressing into your left thigh, press back with that inner thigh. Find more upward lift.  You might reach the fingertips up high overhead.  Beautiful tree practice, vriksasana.  High, all the pinkies forward.  Drop your shoulders, everyone.  Then from your tree, we're going to practice Warrior III.  So what that looks like, it might look like bringing the big toes up, or if you're already up here for the center line, we're going to start by sending the fingertips back, opening through the chest and heart.  And then keeping the right foot alive and bright as you send that leg back. We press through the right heel and inhale.  Reach the fingertips forward.  And again, if you are new to the practice, keep those toes on the floor.  You can always go from hereto here.  One more breath, wherever you are, inhale.  And then exhale.  Hug everything back in.  And we shake it off.  Awesome work, my friends. Let's do the same thing on the other side.  So zipping the legs together, we find our breath again.  Palms together.  Anjali Mudra at the heart.  Peel up through the left foot. And before you just slide into it, you know, or jump into it, find that integrity.  Lift up.  Keep rocking forward through the pelvis, stacking, finding that upward current pressing away from the right foot, rather than. . .  Otherwise, it tends to be all collapsed, holding on for dear life, pain in the foot.  So you can move at your own time.  I'll talk us through this side as well, just in case you're new to the practice, and you want to take it nice and slow. Interlacing the fingertips, we hug the left knee in.  We lift up through the heart.  We draw the elbows down.  So the energetic body comes along for the ride is basically what I'm trying to say here.  Then maybe we slide the left fingertips down to that ankle and we draw it up and in, or we find another variation that works for us here today.  Nice and easy breezy.  Excuse me. And then we press back with the right inner thigh, and we find that lift, and everyone breathes here.  Going through their checklist, lengthening up through the crown of the head, and maybe finding a Mudra on this side that feels right.  So having a little fun.  Don't take it too seriously.  Relax your forehead.  The thing about balancing postures is they're going to tell you what's up right away.  So that can be frustrating.  And if you're frustrated,take a deep breath in and use that exhale to soften.  Really nice work, my friends. We're going to challenge ourselves here by moving into our Warrior III.  So if your toes are on the ground, you can just slide it out.  Send the palms back.  Start here.  And if you're in that tree, stay connected to your center as you send the fingertips back, airplane arms first, just to find a little counter balance, that opposition.  And then we slowly send the heart forward as we release left foot back, toes back.  Navel draws up.  And maybe I stay here pressing into the palms, or maybe I send the fingertips forward. Warrior III, breathe in and out.  Find that opposition.  And to release, we hug everything in.  And step it back and shake it off.  Awesome.  And you out-reach fingertips, all the way up toward the heaven.  And exhale, forward fold.  Inhale, halfway lift.  Exhale, bow.  Heel-toe, heel-toe, the feet wide.  Just coming through your yogic squat, just nice and slow,and coming onto seated.  From your seated posture, bring your hands behind your thighs, and slowly roll it back. Take a twist of your choice.  So it can be a one-legged twist, it can be a recline twist,maybe you sit up on your sit bones and try out a twist.  So we're taking a moment to twist. Check in with the spine.  And then when you're done, hug the knees into your chest one more time.  And then we'll grab the arches of the feet. Picking up back together for a happy baby pose, we slowly draw the soles of the feet up towards the sky and we breathe.  Send your tailbone down towards the front edge of themat.  Relax your shoulders.  One more breath.  And then we release, soles of the feet come together, Supta Baddha Konasana.  Interlace your fingertips.  Bring them behind your head. Arms and legs are mirroring each other here.  I call this Barton Springs pose, named after an amazing natural bed, pool here in Austin, Texas. Extend your thumbs and give yourself a little massage.  That's an order! Really get in there. Massage the back of the head.  Really, really give yourself a little love.  And we'll slide the right toes out, followed by the left.  Stay here and the arms for your shavasanaor release them left to right.  Take a deep breath in through the nostrils.  And exhale out through the mouth.  Awesome practice today, my friends.  Take good care.  Namaste.


Welcome to 30 Days of Yoga with Adriene.  And today is day 12 and I am feeling like a rock star.  Probably because I am wearing my rock and roll yoga pants, which they're pretty ridiculous.  But you know what, sometimes you just have to,you know, do yoga in a big t-shirt, and sometimes you have to wear your rock and roll yoga pants. So wear something you feel rocking in maybe today and let's hop on the mat. All right.  So today we're going to begin standing at the front of our mat.  Let's do feet-hip width apart, and we just stand up nice and tall, and begin to connect to our breath. Spreading awareness through all four corners of the feet and coming into our best and most beautiful tadasana today.  Find your breath.  Then bend the knees softly and inhale, reach the arms up and overhead.  Full body stretch here.  And exhale, forward fold.  Take your time.  Nice and slow.  Inhale.  Find a flat back position here.  Keep it soft and easy breezy beautiful.  Cover girl.  Or guy. Then we'll just take a second here to just check in, stretch it out.  Then slowly, we'll spread the fingertips left to right.  Inhale, reach it all the way back up, stretching out the body, warming up.  And exhale, back down we go.  Inhale, halfway lift.  And exhale, soften and bow.  This time, step or hop it back to plank or half plank.  So we can be here at a top of a push-up or knees lowered.  Hug the elbows into the side body and slowly lower down, cobra or upward facing dog.  Deep breath in.  And to get nice baby cobra, pulling thee bows back and deep breath out as you release. Stay on your belly this time.  So palms are going to be underneath the shoulders here. I'm going to press into the tops of my feet and keep my feet-hip width apart.  So I'm not zipping them up just yet but keeping them nice and wide, and really pressing into the pubic bone here.  Spread the palms wide.  Notice if the elbows are coming out, pull them back. Then inhale, lift up baby cobra. Keep the heart open.  And see if you can slide the fingertips forward, and come onto your elbows.  So elbows are going to replace where the palms are, and I'm going to continue growing up tall.  So it might take a little bit of shimmying to find that stacking of the elbows and shoulders.  And again, we press into the pubic bone actively so pelvis is grounding down.  And then notice if the fingertips have come in or gone out, see if you can keep these two lines. So we're coming into a beautiful sphinx pose.  Extension through the crown.  We draw the shoulder blades in, together and down, we grow up nice and tall.  You can tuck the chin into the chest slightly, and make sure you're not crunching in the back of the neck, but finding awesome length back there.  Then inhale, turn past your right shoulder.  Press into both elbows firmly, evenly.  And then back to center.  Careful not to clench the buttocks here, but keep activity down through the pelvis as you look past the left shoulder.  Stretch, stretch,stretch.  Press into your right elbow.  Breathe.  And exhale back to center.  Great. Now we release slowly onto the belly.  Send the fingertips down towards the bottom edge of your mat.  Inhale, lift up.  Exhale.  Press in your palms, lift the legs up high.  Three breaths here.  You can rotate the ankles, you can spread the toes, reach the fingertips. Pelvis, again, actively grounding down so we're not just kind of lukey flukey, but we'retaking care of the lower back.  You can tuck your chin into your chest if you feel any pressure in the back body.  Breathe, breathe, breathe.  And then we release.  Awesome. Forehead comes to the mat.  Palms come underneath the shoulders.  We curl the toes under, and we transition to downward facing dog.  Work it out here.  Stretch it out.  Breathe.  Then we come to a place of stillness for one full breath, in and out.  Awesome.  This time walk the palms all the way up towards your toes.  And we come into forward fold here at the back edge of the mat.  Inhale.  Halfway lift and exhale.  Slide it down, send the fingertips left to right and inhale.  Reach it all the way up pressing into the feet.  Reach, reach,reach, reach.  And then exhale, hands to heart.  Awesome. Lift your sternum to your thumbs and slowly we're going to rise up onto our toes.  Drawing energy up from the arches of the feet, really maintaining this Mula Bandha and this Uddiyana Bandha, and this beautiful stacking of the spine.  So hands can come together at the heart. And I begin to slowly lift up through the center channel, lifting up onto the tippy tip toes.


Author Name

{picture#YOUR_PROFILE_PICTURE_URL} YOUR_PROFILE_DESCRIPTION {facebook#YOUR_SOCIAL_PROFILE_URL} {twitter#YOUR_SOCIAL_PROFILE_URL} {google#YOUR_SOCIAL_PROFILE_URL} {pinterest#YOUR_SOCIAL_PROFILE_URL} {youtube#YOUR_SOCIAL_PROFILE_URL} {instagram#YOUR_SOCIAL_PROFILE_URL}

Contact Form

Name

Email *

Message *

Powered by Blogger.